Across northern Europe, homeowners have long watched this seasonal shift with a mix of resignation and frustration. Yet in the Netherlands, a simple habit, passed down through generations, has been quietly keeping lawns thick and almost moss‑free – not by attacking the moss once it appears, but by making sure it never really gets started.
Why moss loves your lawn more than grass does
Shady corners, soggy soil and a silent pH problem
Moss is not the villain many gardeners imagine. It is an opportunist. It settles wherever grass struggles.
Shaded areas under trees, damp spots at the bottom of a slope or compacted ground along a path all give moss an advantage. In those conditions, grass roots suffocate, while the delicate filaments of moss keep quietly expanding.
The real game changer is soil acidity. When the pH drops too low, grass growth slows, roots weaken and nutrient uptake falters. Moss, on the other hand, tolerates acid conditions very well.
Acid soil, poor drainage and lack of light create a perfect corridor for moss to move in and take over.
Short, aggressive mowing adds to the problem. When lawns are scalped down to a few centimetres, grass plants lose leaf area, store less energy and become more vulnerable to stress, especially in winter. Moss uses that weakness to colonise bare patches.
The warning signs before moss appears
You do not need to wait for a green carpet of moss to appear before acting.
Several small changes usually appear months earlier:
- Grass that looks thin and see‑through, with soil clearly visible
- Pale or yellow patches that do not respond much to fertiliser
- A slightly spongy or felt‑like surface when you walk on the lawn
- Soil that stays sticky and compact the day after rainfall
These signals often mean the soil is turning more acidic, compacted or both. Left alone, these are the exact conditions in which moss tends to dominate.
➡️ Wie Reise-Hacks für Solos Sicherheits-Apps mit Echtzeit-Location-Shares inkludieren
➡️ Warum du erfolg loslassen musst, um wirklich glücklich und motiviert zu leben
➡️ Unhappy people frequently use these 5 phrases, psychologists say
➡️ Warum sich viele Menschen abends erschöpft fühlen, obwohl sie tagsüber kaum körperlich aktiv waren
➡️ Der wirkungsvolle Trick mit Alufolie am Türgriff, den viele Menschen nutzen
The Dutch secret: using wood ash before moss takes hold
How a winter fireplace habit became a lawn trick
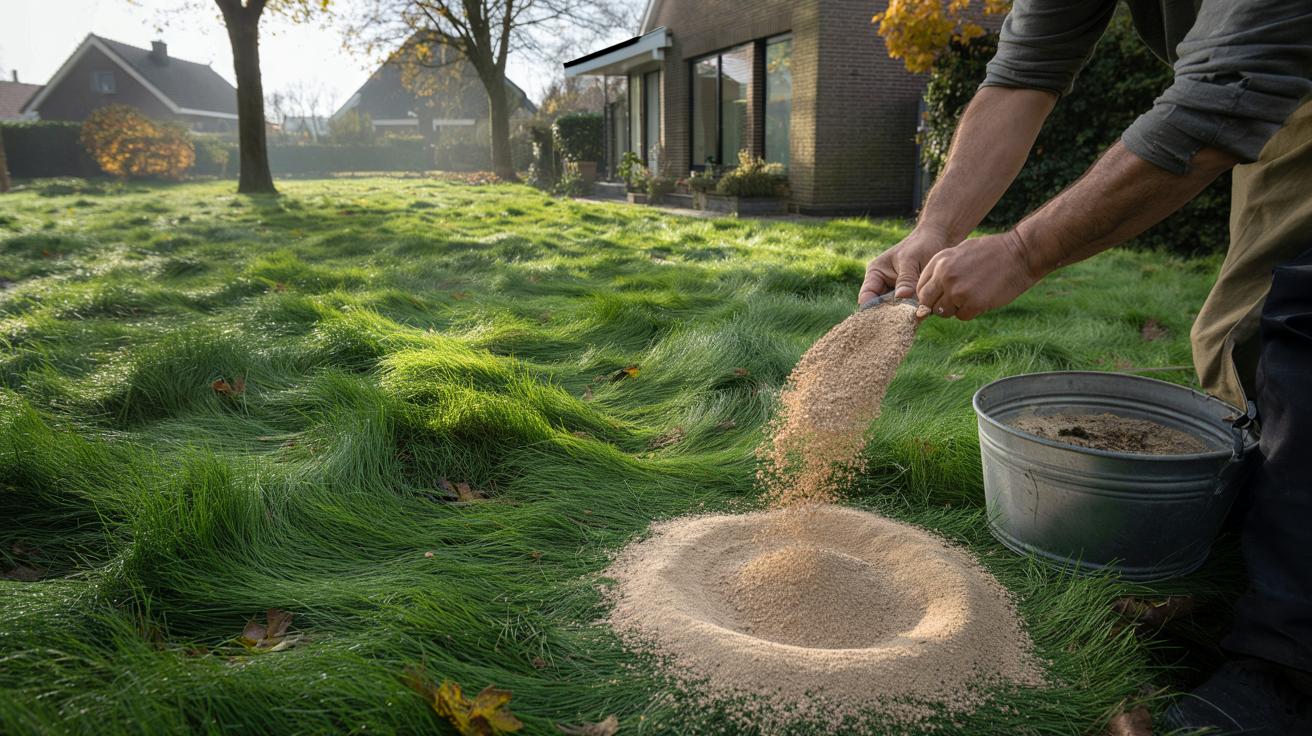
In many Dutch households, wood‑burning stoves are still common. Instead of throwing the ash away, gardeners there have long scattered small amounts over their lawns at the end of autumn.
This ash is not a magic powder. It is simply the mineral residue left when wood is burned. It is rich in alkaline compounds and several key nutrients.
By lightly spreading wood ash in late autumn, Dutch gardeners quietly nudge their soil pH back towards a range where grass thrives and moss struggles.
Each application gently neutralises excess acidity. Over a few seasons, this can shift the balance: grass roots go deeper, blades grow thicker, and bare patches gradually shrink. In those conditions, moss finds far fewer gaps to colonise.
What wood ash actually adds to the soil
Wood ash contains no nitrogen, but it is packed with other minerals that lawns use.
| Element | Role for the lawn |
|---|---|
| Potassium (K) | Improves disease resistance and winter hardiness |
| Calcium (Ca) | Raises pH, improves soil structure and root growth |
| Phosphorus (P) | Supports root development and early season growth |
Because the minerals are in a very fine form, they act relatively quickly at the surface, where most lawn roots sit. Used in moderate amounts, ash behaves like a gentle, free soil conditioner and fertiliser rolled into one.
When and how to spread wood ash on your lawn
The key moment: late autumn, after the leaves fall
The Dutch timing is deliberate. The best window runs from late October through November, once most trees have shed their leaves and lawn growth is naturally slowing down.
In that period, soil is still active enough to respond to amendments. Rain is frequent, which helps wash minerals from the ash down into the root zone. At the same time, shorter days mean less stress from mowing or heat.
One light application each late autumn is usually enough to influence pH and give grass a smoother start the following spring.
There is also a practical angle: households with wood burners usually start producing ash around this time, so the material is readily available and free.
Step‑by‑step: the Dutch way to use ash safely
A few ground rules keep wood ash helpful rather than harmful.
- Use only ash from untreated wood – no painted, varnished or glued timber
- Allow ash to cool completely, then sift out nails, charcoal and large chunks
- Choose a dry, wind‑free day to avoid clouds of dust
For the actual spreading, Dutch gardeners usually work with modest quantities: around 70–100 grams of ash per square metre. That equates to a thin, almost translucent veil over the grass, not a visible grey layer.
Scatter it by hand or with a fine mesh sieve, walking in overlapping lines to keep distribution even. Once spread, a quick pass with a rake or lawn brush helps settle the ash into the thatch and upper soil.
If light rain is forecast within a day, that is ideal. Heavy downpours, on the other hand, can wash ash into drains or concentrate it in low spots, which is best avoided.
Common mistakes and how to avoid them
When wood ash becomes a problem, not a solution
Too much ash can push soil pH too far in the opposite direction, making conditions alkaline. That can lock up some nutrients and stress the grass in a different way.
The Dutch approach is based on moderation: a little ash once a year, not a thick dump every time the stove is emptied.
Other pitfalls include:
- Spreading ash on frozen or waterlogged ground, where it will not integrate well
- Applying ash and lime in the same year, which can send pH soaring
- Piling ash around tree bases or shrubs, where salt levels may damage roots
Gardeners with already alkaline soil, often found in chalky areas of southern England or parts of the US Midwest, should be especially cautious. In those gardens, soil testing before using any ash makes far more sense than guessing.
Routines that boost the anti‑moss effect
Wood ash alone will not rescue a lawn that never sees daylight or is constantly soaked. Dutch gardeners usually combine ash with small, regular maintenance habits.
- Occasional aeration with a fork or hollow‑tine tool to relieve compaction
- Leaving the grass at about 4–5 cm, especially before winter
- Thinning low tree branches to let more winter light through
- Overseeding bare areas with tough, shade‑tolerant grass varieties
Together, these habits create a lawn environment where grass covers the soil densely. Moss finds fewer footholds and remains a minor guest rather than a dominant resident.
What to expect across the seasons
From the first winter to the following spring
Most gardeners who try this Dutch method notice only modest changes in the first winter. The surface may feel slightly firmer, and rainwater might drain away more cleanly.
The more visible shift comes with the first growth flush in spring. Grass often greens up more evenly and fills out, especially in areas that used to look tired or patchy. Moss that had been creeping in around stepping stones or along fences tends to stay subdued, or disappears altogether with raking.
Results build over several years, as each small ash application gently nudges the soil closer to grass‑friendly conditions.
How this compares with chemical moss killers
Traditional moss killers, based on iron sulphate or similar compounds, scorch moss quickly. They also darken the lawn and can stain paving. The moss turns black within days, but the underlying causes – acidity, compaction, shade – remain untouched.
The Dutch ash technique follows a slower path. It does not burn moss; it weakens the habitat that moss needs while feeding the grass. The lawn then outcompetes moss naturally. This approach usually means less sudden visual drama, but fewer cycles of kill, regrow and re‑treat.
Extra insights for gardeners tempted to try it
Understanding pH without a science degree
Soil pH runs on a scale from 0 to 14. Most lawns are happiest between 6 and 7.5. Below 6, many nutrients become harder for grass to access, even if they are present in the soil. Moss, on the other hand, keeps functioning quite well down to much lower pH values.
A cheap soil pH test kit or meter gives a useful snapshot. Gardeners in high‑rainfall regions or with lots of conifers often see readings on the acidic side. These are the gardens where a cautious ash programme is most likely to help.
A practical scenario: a small suburban lawn
Imagine a 50‑square‑metre lawn behind a semi‑detached house, shaded on one side by a fence and cherry tree. Each autumn, the owner rakes leaves, mows one last time and then lightly spreads 4–5 kilograms of sifted wood ash, avoiding flowerbeds.
In the first spring, moss still appears in the shadiest corner, but less vigorously. The owner aerates that spot and oversows with a shade mix. The second autumn, the ash treatment is repeated. By the third year, the lawn is not flawless, but the once‑dominant moss patches have shrunk to narrow fringes that can be easily raked out.
This kind of incremental gain reflects how the Dutch technique works in real gardens: small annual gestures, modest expectations and a steadily healthier lawn that simply leaves less space for moss to take over.