The smell always tells the story first.
You lift the lid, a hopeful glance into the pot, and then it hits you: that bitter, slightly metallic perfume of something that’s gone from golden-brown to just… brown. Dinner can still be rescued, maybe. The bottom of the pot? A black, stubborn moonscape that feels like a lost cause.
You soak it, you scrub it, you try not to scratch it, and somewhere between the third sponge and the cold water you start regretting every recipe that said “just leave it on low heat”.
We pretend it’s a rare accident. It usually isn’t.
There’s a quiet little trick that changes the whole scene.
Why burnt pot bottoms feel like a small personal failure
There’s a strange kind of shame that comes with a burnt pot.
You don’t post that on Instagram. You just stand at the sink, rubbing at dark circles that won’t budge, wondering how other people manage to simmer rice without welding it to the metal.
The pot suddenly tells a story you don’t want to hear: distracted scrolling, a phone call a bit too long, the “just five more minutes” that turned into twenty.
And the worst part is not the stain, it’s the thought: “Great, I’ve ruined it. Again.”
Ask around and you’ll hear the same confession.
A student’s first apartment pan, turned permanently brown under a forgotten tomato sauce. A parent’s favorite soup pot, sacrificed during homework chaos. A shiny stainless-steel casserole, burnt on day two because the owner “wanted to try risotto properly”.
We like to pretend this never happens, yet everyone you know has at least one pot hiding in the cupboard, always turned so the cleaner side faces out.
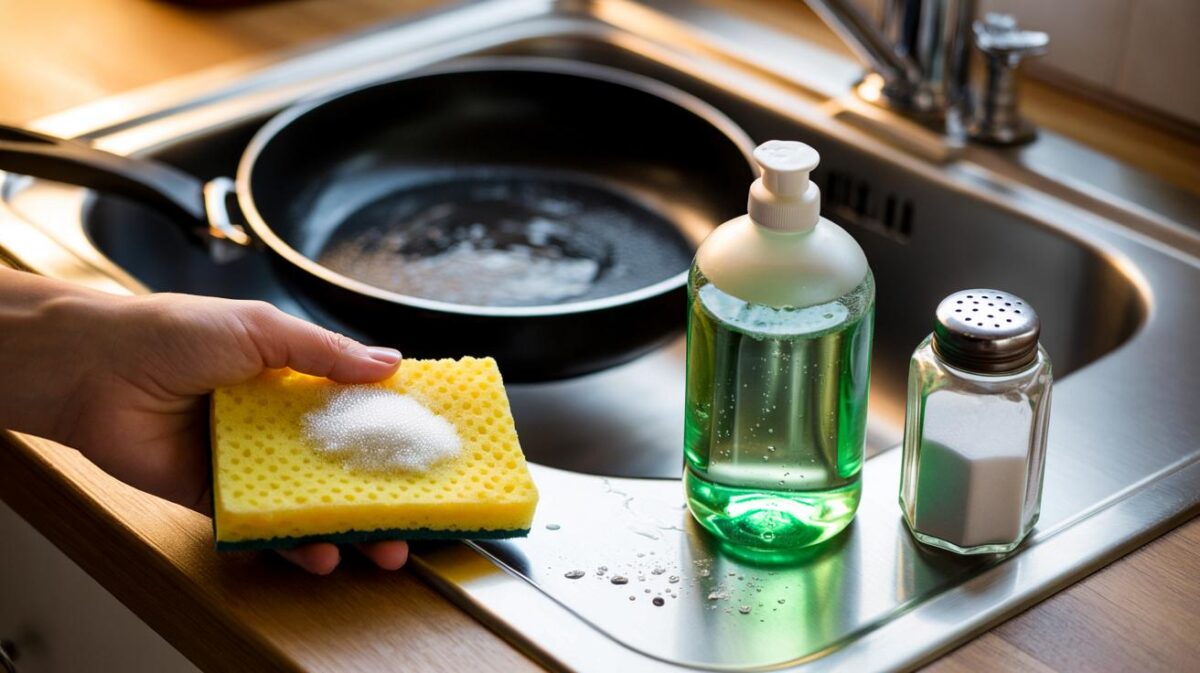
Kitchen shops sell “magic sponges” and aggressive powders, but most of them demand brutal scrubbing or toxic fumes that make your eyes sting.
There’s a simpler way that doesn’t feel like battlefield cleanup.
Burnt marks at the bottom of a pot are just food residues and carbon stuck in microscopic pores in the metal. That’s all – not a curse, not the end of your cookware.
Certain everyday ingredients can soften, lift and “float” these residues away, so you don’t have to fight them with brute force.
Once you see the logic behind it, the whole situation loses its drama. You’re no longer the person who ruins pots. You’re the one who knows how to reset them.
The simple trick: let the pot clean itself
Here’s the move that quietly saves both your pot and your nerves.
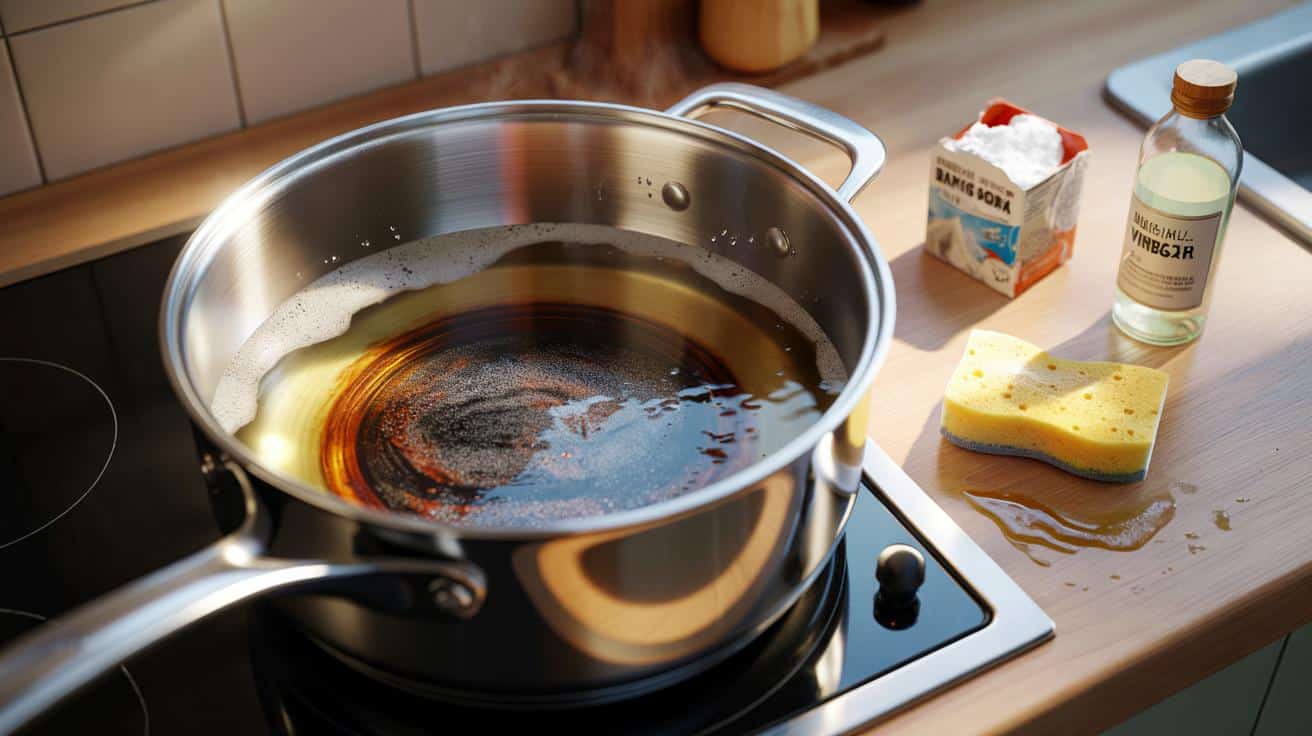
Fill the burnt pot so the bottom is just covered with water, then add **two generous tablespoons of baking soda**. For hard, dark burns, throw in a splash of plain white vinegar.
Place the pot back on the stove and bring the mix to a gentle boil. Let it simmer for 10–15 minutes.
You’ll see tiny brown particles starting to float, the water turning tea-colored. That’s the burnt layer lifting.
Turn off the heat and let the pot cool enough for your hands.
Pour out most of the liquid, leaving a thin layer over the bottom. Now take a soft sponge, no metal, and wipe in slow circles.
What was once rock-hard suddenly feels like soft mud. The black marks smear away instead of resisting. Sometimes a second round of baking soda paste (just powder plus a few drops of water) finishes the job.
Let’s be honest: nobody really does this every single day.
You keep this trick for the “I think I killed my pot” days, and that’s exactly when it feels like a miracle.
*“I thought my pan was done for after I burnt caramel in it,”* says Lena, 34, who cooks almost every evening after work. *“I tried this baking soda boil just to feel less guilty before throwing it out. Fifteen minutes later, the black ring that survived three different cleaners just wiped off. I actually laughed out loud at the sink.”*
- Use gentle heat: A strong rolling boil can spit and dry out too fast; a soft simmer works better and is safer.
- Stay with the pot: You’re rescuing it from burns, not giving it a second chance to burn worse.
- Skip metal pads: They may scratch stainless steel and completely ruin non-stick coatings.
- Rinse thoroughly: Any white baking soda film disappears with hot water and a tiny drop of dish soap.
- Repeat instead of forcing: Two mild rounds beat one brutal attack that scars the surface.
From “ruined” to “ready”: living with imperfect pots
Once you’ve watched a burnt bottom slowly come back to life, your relationship with your pots shifts a little.
A mishap is no longer a crime, just a cleaning session waiting to happen. You stop throwing away cookware for a single bad evening.
You also start cooking with a different kind of calm. If the phone rings or the sauce thickens faster than expected, it’s not a disaster, it’s a manageable mess.
And every time you watch that brown water swirl down the drain, there’s a small sense of victory that goes far beyond stainless steel.
| Key point | Detail | Value for the reader |
|---|---|---|
| Gentle boiling with baking soda | Cover the bottom with water, add 2 tbsp baking soda, simmer 10–15 minutes | Removes burnt layers without exhausting scrubbing |
| Soft tools only | Use sponges or soft brushes, avoid metal pads on most surfaces | Protects pots from scratches and extends their lifespan |
| Repeat, don’t force | Do a second light round instead of pushing too hard the first time | Gets better results while keeping the pot looking new |
FAQ:
- Question 1Can I use this trick on non-stick pans?
- Question 2Does the baking soda method work on very old burnt stains?
- Question 3What if I don’t have baking soda at home?
- Question 4Will vinegar damage my stainless-steel pots?
- Question 5How can I avoid burnt pot bottoms in everyday cooking?